12 KiB
Media Manager
Once you get your system set up for OpenLP you will be ready to add content to your Service Manager. This will all happen through the Media Manager. The Media Manager contains all the Bibles, Songs, Presentations, Media, and Custom Slides that you will project through OpenLP.
Enabling the Plugins
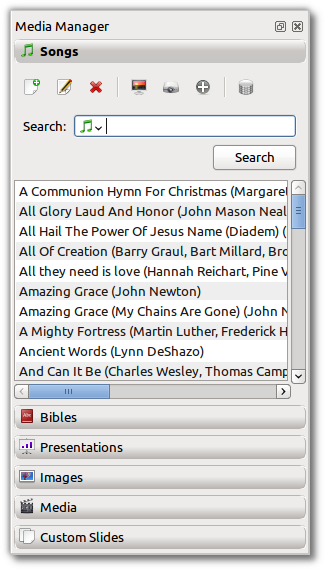
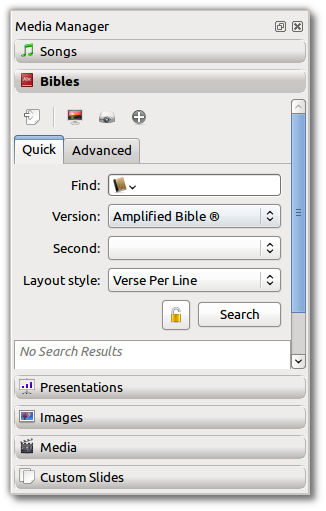
You may need to enable the default plugins that are built in to OpenLP. As you can see below this is what the Media Manager looks like with all the plugins enabled.
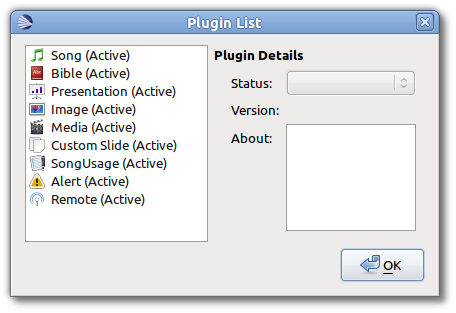
To enable the plugins navigate to Settings --> Plugins or press Alt+F7. You will want to
click on the plugin to the left that you would like to enable and select
Active from the drop down box to the right.
You are now ready to add content for your service.
Adding Media Content
This section will describe how to add the different types of media OpenLP is capable of displaying.
Songs
Clicking on Songs in the Media Manager will display all of the songs you have added by Title and Author/Authors.
Using the buttons you can:
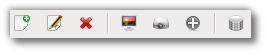
- Add a song:
-
Brings up the dialog box to add a new song
- Edit the selected song:
-
Brings up the dialog box to make changes to the song
- Delete the selected song:
-
Removes the song from your song list
- Preview the selected song:
-
Lets you see what your song will look like displayed live
- Send the selected song live:
-
This option will immediately display your song live.
- Add the selected Song to the service:
-
This will enter your song in the Service Manager. You can also drag your song over to the Service Manager.
- Maintain the list of authors, topics and books:
-
Brings up a dialog box to edit Authors, Topics or Song Books. Note: Right clicking on a song file will bring up some of the same options.
- Search:
-
Clicking on the icon in the Search box will display a list of options for you to search your song database.
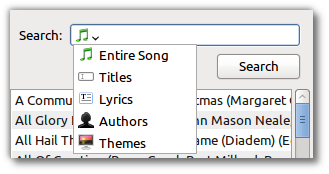
You have these options to search.
- Entire Song: This option will search Titles, Lyrics and Comments.
- Titles: This option will search Titles only.
- Lyrics: This option will search Lyrics only.
- Authors: This option will search Authors only.
- Themes: This option will search for the assigned theme to the song.
Use the Search
button to display your results in the box below.
Bibles
Clicking on Bibles in the Media Manager will display your options for searching and adding chapters and verses to the Service Manager.
Using the buttons you can:

- Import a Bible:
-
This is discussed in detail on the Bible Importer page in the manual.
- Preview the selected Bible:
-
Sends your selected verses to the Preview window
- Send the selected Bible live:
-
This option will immediately display your selected verses live.
- Add the selected Bible to the service:
-
This will enter your verses into the Service Manager. You can also click and drag your verses over to the Service Manager.
Quick tab
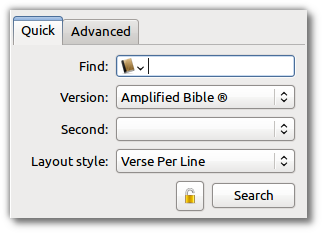
Find
You will type your search query in this box for the following two searches. Clicking the icon in the Find box will give you the choice of searching by Scripture Reference or Text Search.
Scripture Reference: You can search for a specific verse using this format below.
- Book Chapter
- Book Chapter-Chapter
- Book Chapter:Verse-Verse
- Book Chapter:Verse-End (this will display verses to the end of the chapter)
- Book Chapter:Verse-Verse, Verse-Verse
- Book Chapter:Verse-Verse, Chapter:Verse-Verse
- Book Chapter:Verse-Chapter:Verse
- Text Search
-
You can also search by a keyword or words. The more words you use for the search, the more you will narrow down your results.
Version
Once you have imported a Bible, it will be displayed in the Version drop down box. Select the version of the Bible you want to use here.
Second
If you have “Display second Bible verses” selected in Configure OpenLP --> Bibles tab, this
choice will be visible. This option is for displaying another version of
the Bible for comparison. Both versions will be displayed. If there is
not enough space on one slide, the Second version will be displayed on
the next slide.
Click the Search button to display your results in the box
below.
Layout style
There are three options to determine how your Bible verses are displayed.
- Verse Per Slide will display one verse per slide.
- Verse Per Line will start each verse on a new line until the slide is full.
- Continuous will run all verses together separated by verse
number and chapter if chapter is selected to show above. This setting is
also accessible through
Configure OpenLP --> Biblestab.
Note: Changes to Layout Style do not affect verses already in the Service Manager.
Each search you make will display your verses in the box below.
Toggle lock to keep or clear the previous results.


If you would like to display verses that are out of sequence you can click on the lock icon and continue your search for the next verse or verses. All searches will be shown and kept below. If you click the lock icon again, each new search clears the previous search from the list below.
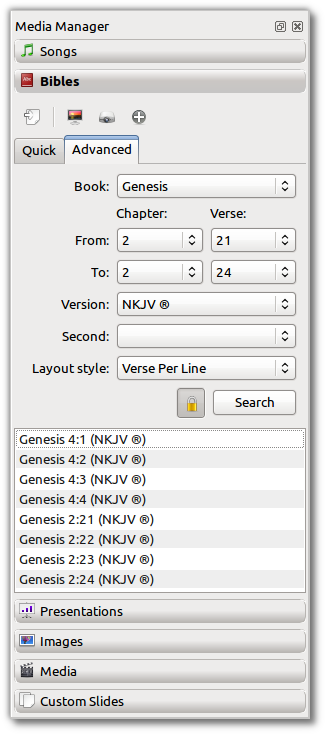
Advanced tab
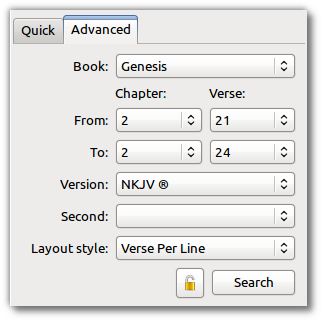
The Advanced tab is convenient for selecting book, chapter and verse by name and number.
- Book:
-
Click on the drop down box and select the book you want to display.
- Chapter: Verse:
-
Select your chapter From and To and Verse From and To.
Version and Second are the same as in Quick tab above. Click on each box and select the version you wish to display and Second version if you wish to display an alternative version for comparison.
Layout style
There are three options to determine how your Bible verses are displayed.
- Verse Per Slide will display one verse per slide.
- Verse Per Line will start each verse on a new line until the slide is full.
- Continuous will run all verses together separated by verse
number and chapter if chapter is selected to show above. This setting is
also accessible through
Configure OpenLP --> Biblestab.
Note: Changes to Layout Style do not affect verses already in the Service Manager.
Click the Search button to display your results in the box
below.
Each search you make will display your verses in the box below.
Presentations
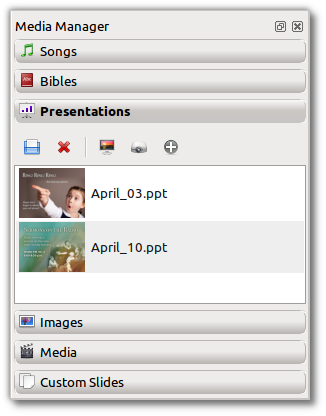
Using the buttons you can:

- Load a new presentation:
-
This brings up a dialog box to find your presentation and list it in OpenLP.
- Delete the selected Presentation:
-
This removes your Presentation from the list. Please note: this will not delete the presentation from your computer, only from the OpenLP list.
- Preview the selected Presentation:
-
Sends your selected Presentation to the Preview window
- Send the selected Presentation live:
-
This option will immediately display your selected Presentation live.
- Add the selected Presentation to the service:
-
This will enter your Presentation into the Service Manager. You can also click and drag your Presentation over to the Service Manager.
Right clicking on a Presentation file will bring up some of the same options.
Images
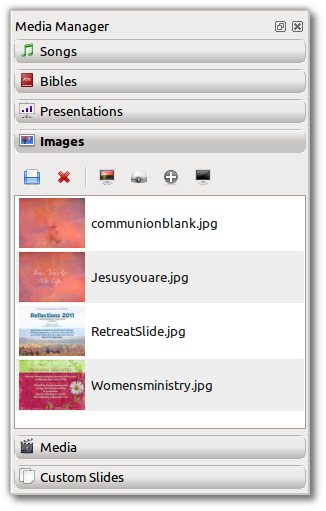
Using the buttons you can:

- Load a new Image:
-
This brings up a dialog box to find your Image and list it in OpenLP.
- Delete the selected Image:
-
This removes your Image from the list. Please note: this will not delete the Image from your computer, just the OpenLP list.
- Preview the selected Image:
-
Sends your selected Image to the Preview window.
- Send the selected Image live:
-
This option will immediately display your selected Image live.
- Add the selected Image to the service:
-
This will enter your Image into the Service Manager. You can also click and drag your Image over to the Service Manager.
- Replace Live Background:
-
With an Image selected, clicking this button will immediately replace the live background being displayed with your selection. The Image will replace the theme background until the theme changes or the "Remove Background" button is pressed.
Right clicking on an Image file will bring up some of the same options.
Media
Media is an audio or video file. Generally if you can play or view your media on your computer without OpenLP, you can also play it in OpenLP.
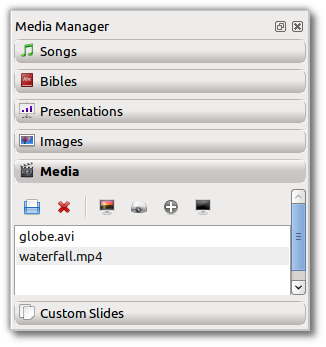
Using the buttons you can:

- Load a new Media:
-
This brings up a dialog box to find your Media and list it in OpenLP.
- Delete the selected Media:
-
This removes your Media from the list. Please note: this will not delete the Media from your computer, just the OpenLP list.
- Preview the selected Media:
-
Sends your selected Media to the Preview window.
- Send the selected Media live:
-
This option will immediately display your selected Media live.
- Add the selected Media to the service:
-
This will enter your Media into the Service Manager. You can also click and drag your Media over to the Service Manager.
- Replace Live Background:
-
With a Media file selected, clicking this button will immediately replace the live background being displayed with your selection.
Right clicking on a Media file will bring up some of the same options.
Custom Slides
Custom Slides gives you the option of creating your own slide. This is useful for displaying readings, liturgy or any text that may not be found in Songs or Bibles.
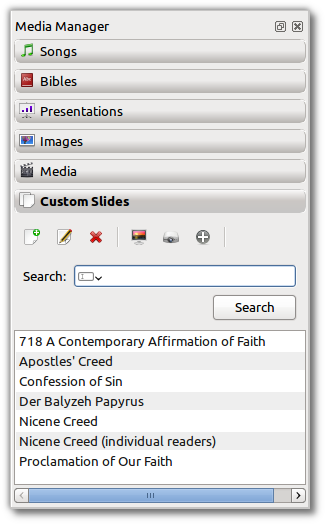
Using the buttons you can:

- Add a new custom slide:
-
Brings up the dialog box to add a new Custom slide display.
- Edit the selected custom slide:
-
Brings up the dialog box to make changes to the custom slide.
- Delete the selected custom slide:
-
Removes the custom slide from your list.
- Preview the selected custom slide:
-
Lets you see what your Custom will look like displayed live.
- Send the selected custom slide live:
-
This option will immediately display your custom slide live.
- Add the selected custom slide to the service:
-
This will enter your custom slide in the Service Manager. You can also drag your custom slide over to the Service Manager.
Right clicking on a custom slide file will bring up some of the same options.
When you Add a new custom slide a dialog box will appear.
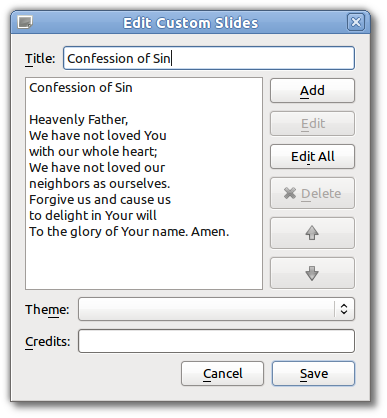
- Title:
-
Name of your custom slide.
- Add:
-
After clicking on Add you will enter your text you want to display in this box. To create multiple slides, click the Split Slide button. When you have finished adding your text, click on the Save button.
- Theme:
-
Select the theme you want to use for your Custom slide from this drop down box.
- Credits:
-
Anything typed in this box will be displayed in the footer information on the display. When you are finished, click the
Savebutton.
To Edit your slide, click on Edit to edit part of it or Edit All if you need to
make multiple changes. Use the Up and Down arrows to change the
arrangement of your custom slide.