17 KiB
Service Manager
Creating a Service
Now that you have OpenLP set up the way you want, it is time to put it to use.
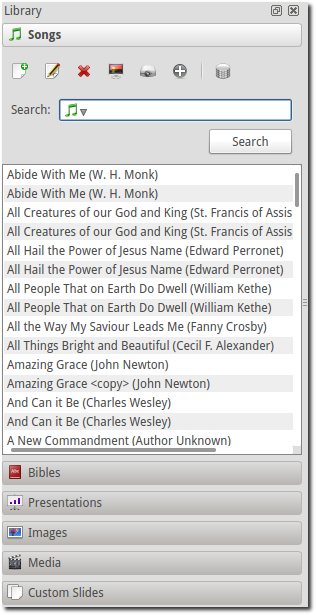
Everything you need to display will be in the left panel called the
g-media-manager, under
their respective categories. Using the g-media-manager you can add new media, songs, images,
Bibles or create a custom slide as discussed earlier in the media-manager section.
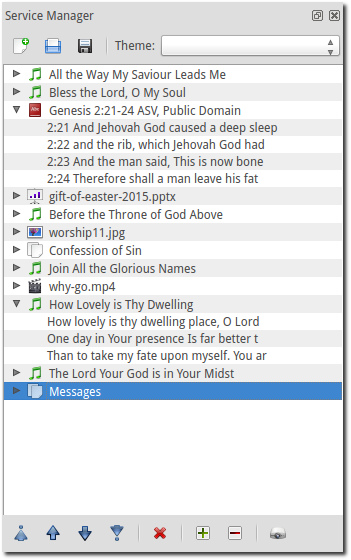
On the right side of your screen at the top is the Service Manager. Everything you want to display should be in the Service Manager and preferably in the order you want to display it.
New, Open and Saving the Service
Three icons at the top of the Service Manager will do the following:
 Create
a new service:
Create
a new service:-
This first icon will create a New Service.
 Load
an existing service:
Load
an existing service:-
This second icon will open an already created service file. Use this icon to to find the location of your file or you can open a saved service by dragging and dropping it into the service manager. The service will be opened and the existing service replaced. You will first be prompted to save your previous service if changes were made.
 Save
this service:
Save
this service:-
This icon will Save the service you created, added to, or rearranged. The order of service, songs, images, Bible verses, service notes, and custom slides are all saved in the file.
Changing the Service Level Theme
If you click on the Theme dropdown, you have the option to set the
Service level theme. This option is covered in greater detail under
configtheme.
Note: This feature is only available if you have the Theme level set
to Service or Song Level in configtheme.
Editing Songs in the Service
You can create your service file on a different computer than the
projection computer. If a song is not in the projection computer
database when you open the saved file OpenLP will automatically import
the song into the song database with this option checked here config_songs "Add missing
songs when opening service."
You always have the ability to edit the song in the service manager
by right clicking on the song and choosing Edit Item from the
context menu. Follow the directions here songs_create_edit to make changes to your song.
Note: Editing a song in creating_service will be
applied to the creating_service song database. Editing a song in the
media-manager will be
applied to the song in your media-manager. This can be changed so that changes
made in the creating_service song database update the media-manager song database
and changes made in the media-manager song database update the creating_service song
database in configure.
Adding Media
To add your media you can click on an item in the media-manager hold and drag
your selection from the media-manager over to the Service Manager or,
after clicking the media or verse you want to use, click the  . This will add your media
to the service side at the bottom. Once it is in the Service Manager you
can click on your item and drag and drop it in the order you want or,
click the item and use the icons shown below to move it up or down in
the order you want.
. This will add your media
to the service side at the bottom. Once it is in the Service Manager you
can click on your item and drag and drop it in the order you want or,
click the item and use the icons shown below to move it up or down in
the order you want.
 Move item to the
top of the service.
Move item to the
top of the service.
 Move item up one
position in the service.
Move item up one
position in the service.
 Move item down
one position in the service.
Move item down
one position in the service.
 Move item
to the end of the service.
Move item
to the end of the service.
To view your Bible or song verses one by one, use the icons below. This is a convenient way to move around through the verses if they are skipped or repeated. Double-click on the verse you want to display live.
 Expand
all the service items.
Expand
all the service items.
 Collapse all the service items.
 Send the selected item
to Live.
Send the selected item
to Live.
 Remove the
service item.
Remove the
service item.
As an alternative to expanding or collapsing all items in the list you can use the buttons to the right of a list item to expand or collapse a single list item.
 Expand a single service item.
 Collapse a single service item.
Note: You always have the option to send any media
live direct from the media-manager. Please see the media-manager section for
more details.
Displaying an Item
When you have all of your items needed for the service in your
Service Manager there are a few ways to get them to display on the
screen. You can double-click the item, click it once with the mouse and
push the Enter key on
your keyboard, right click the item and left click Show Live or
click it once with the mouse and click on the projector at the bottom of the Service
Manager.
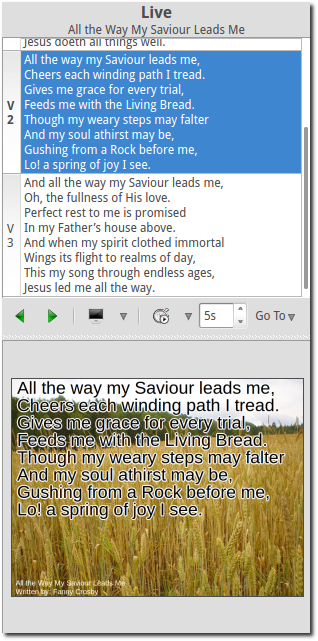
Any of these methods will display your item on the screen. When your item is displayed, it will appear in the Live windows just to the left of the Service Manager.
To Preview an item in the left Preview panes, right click the item and left click Show Preview.
Changing a Service Theme
When you get your Service file set up and you are previewing a slide
or sending it Live and you notice you don't have the correct theme for
it, you can right click the item and mouseover Change Item Theme and
select the theme you want to use.
Moving Through a Service
Once you have your first item displayed live you can move through the
service in a couple of ways. You can double-click on each item you need
displayed, or click it once and press enter. If your songs, verses, etc.
are in the order you will be displaying them, you can use the Right Arrow key on your
keyboard to move down through your service. Pressing the Left Arrow key will move up
through the service. Every time you press the Left Arrow or Right Arrow key the next item
in your Service will be displayed.
Moving Through a Song, Bible Verses or Images
When you display a song or Bible verse with multiple verses you will need to move through them. When a song or verse is being displayed you will see the lyrics in the top Live window and how it actually appears on your display in the bottom Live window.
To change slides you can use your mouse to click on each slide in the top Live window, use the Left Arrow and Right Arrow icons under the top Live window.
 Move to next.
 Move to
previous.
Move to
previous.
You can use the Down Arrow key to move down through the song or
verses. Using the Up Arrow key will move you from bottom to top. Page Up and Page Down keys will do the
same thing.
There is shortcut support for the Live Controller in OpenLP. This allows you to navigate through, and jump between, your slides in the Live Controller using only your keyboard. This works for any type of slides, e.g. songs, Bible verses and images.
How does it work?
If you want to jump to verse 3 using the keyboard you press v and within a time frame of
350ms you press 3. Keep
in mind to be quick and you will be successful.
The available keyboard shortcuts are:
- Verse: v
- Chorus: c
- Bridge: b
- Pre-Chorus: p
- Intro: i
- Ending: e
- Other: o
- and the numbers from 0-9
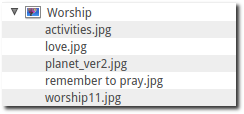
Adding a Group of Images
At some point you may have a group of images to display together. It
may be pictures from a youth group adventure, bulletin announcements, or
some other reason. You can either create the group in the media-manager and then click
the  icon above the
images, or you can manually select a group of images. Do this by holding
the
icon above the
images, or you can manually select a group of images. Do this by holding
the Ctrl key on your
keyboard and click each image you want to add as a group. As you click
the images they will remain highlighted. When you are done with your
selections you can either click the icon above the images or, click on one of the
highlighted images, hold the mouse button and drag them over to the
Service Manager side and place them where you need them.
Sorting a Group of Images
If you do not like the order the images are in, right click Images.
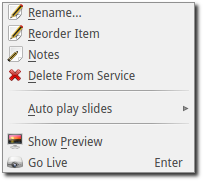
Left click Reorder Item.
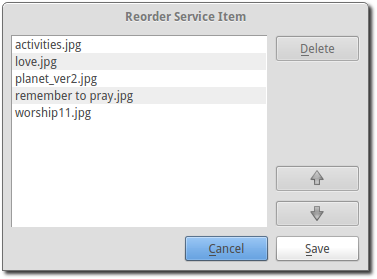
From this box you will be able to rearrange the order of your images
by clicking on one and using the Up and Down arrows to move it to where you want it. If
there is an image you do not want in your order, click on it and then
click the Delete
button. When you are done arranging your images click Save.
If you need to add another image from the media-manager to your group
of images, left click the image you want to add and hold the mouse
button and drag it over your group of Images and release the mouse
button. You will be given two options, Add New Item and Add to Selected Item.
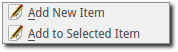
If you click Add New Item your image will be separate from
your group of images as another item at the bottom of the Service. If
you click Add to Selected Item your image will be added to
your group of images.
Renaming a List Item
You can rename an item in the list to make it easier to understand. This is done by right clicking on item in your service manager and left clicking Rename.
Adding a Service Note
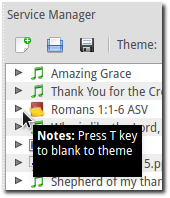
You have the ability to leave yourself or the next projector person a service note. This is done by right clicking on an item in your service manager and left clicking Notes.
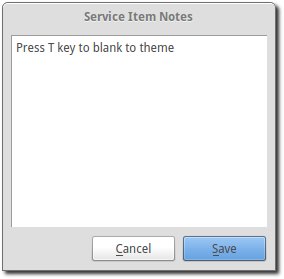
You can type your note in the box and click Save. If you change your
mind you can click Cancel. Your note will appear as a yellow note on
your item.
![]()
To view your note move your mouse cursor over the item in your service and you will see a popup with the information you typed in your note.
If you need to change your Note or delete it, open it again, delete
your text and click Save
Creating a New Custom Slide
You have the ability to create a custom slide in the service manager
by right clicking on the Song, Bible Verse or Custom Slide then choosing
Create new Custom Slide from the context
menu. Follow the directions here media-manager to create your new custom slide.
Using the Service Timer
The Service Timer is available for any media item with multiple slides. This includes Bible verses, Songs, or a group of images. The Service Timer is accessed in the Live Controller Bar between the Live panes.

The time delay increment is in seconds. Use the up or down arrow on the right of the timer to change the number of seconds or type in the number of seconds you want to use. This number determines how many seconds will lapse before your media item will automatically change to the next slide.
Immediately to the left of the second counter is a down arrow. Clicking on this arrow will give you two options for the use of the timer.
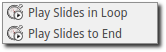
- Play Slides in Loop:
-
Selecting this option will continuously loop your slides from beginning to end, and back to the beginning again. The slide loop will continue until you click the timer start and stop button again or move to the next service item.
- Play Slides to End:
-
Selecting this option will display your slides through once and stop at the end.
 Timer start and stop:
-
Click this button to start or stop the timer function. You can also use the keyboard shortcut
Lto start and stop the continuous loop.
Using the Media Timer
Note: The media timer is only available when you are
using System as your default player. Please check your media
configuration here: Settings --> Configure OpenLP --> Media.
Configure your player using System with these instructions. media_configure.
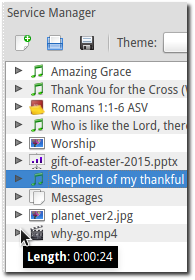
The media timer is used when you have a media file in your service manager and you would like it to start and/or stop at a specified time.
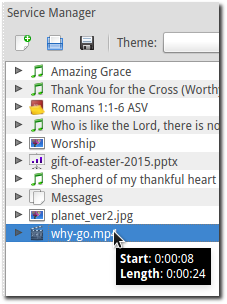
After adding your media file to the creating_service you can mouseover your file and the
popup will show you the play time "Length" in hours, minutes and
seconds.
Right click on your media file and left click Start Time.
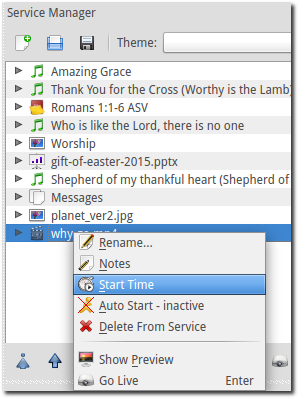
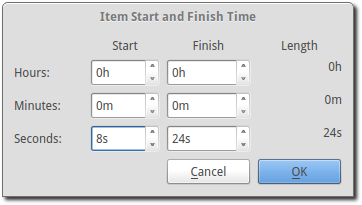
- Item Start and Finish Time
-
The start and stop time default to the beginning and end of the video.
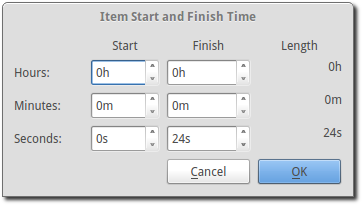
Change the hours, minutes and seconds to the times you want your
video to begin and end. When you are finished click Ok to save your changes
or Cancel to leave
the times as they were originally. When you display your media live it
will start and stop with the times you configured.
After your changes have been saved you can check your start and stop times by putting your mouse cursor over the media file.
Using the "Blank to" Control
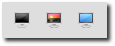
On the Live Controller Bar in between the Live windows are three options to Blank your screen. Depending on how narrow your slidecontroller is, the three options will be presented as a dropdown menu in the toolbar.

Or as three separate buttons in the toolbar.
 Blank
Screen:
Blank
Screen:-
Choosing this option will blank your projector to black as if it were shut off. The shortcut for this option is
.(fullstop/period on your keyboard).  Blank to Theme:
-
Choosing this option will show your blank theme only, without lyrics or verses. If you are blanking a song with an assigned theme it will blank to that theme. If no theme is assigned or you are blanking a presentation or image, it will blank to the global theme. The shortcut for this option is
T.  Show Desktop:
-
Choosing this option will show your desktop wallpaper or a program that you have open on the extended monitor or projector. You can seamlessly switch between one program and OpenLP by Blank to Desktop. The shortcut for this option is
D.
You can change or add to the keyboard shortcuts here Settings --> Configure Shortcuts.
Linked Audio Control
 You can
stop or start the audio playing on your
You can
stop or start the audio playing on your songs_linked by using this button. This button becomes
available when you have linked an audio file to a song and it is in
use.
Saving the Service
- Save
this service:
-
This icon will Save the service you created, added to, or rearranged.
Now that you created your service, tested it and are ready for your
worship service, you will want to save your service file. OpenLP will
remind you to do this when you close the program or you can click the
save button new_service
at the top of your service file. Choose the location you want to save
your file and click Ok.