2.7 KiB
The Stage View
Stage view gives you the ability to set up a remote computer, netbook or smartphone to view the live service being displayed on the projection screen in an easy to read font on a black background. This is a text only viewer, tough it will show thumbnails of images and presentations.
The first step is to make sure the Remote plugin is activated. You
can accomplish this by following the instructions in the plugin_list. The second step
is to configure the settings you will use with the web browser. You can
find these instructions and settings in remote_tab.
Open a web browser, type in the Stage View URL you found in remote_tab and press the
Enter key. For this
example we will use http://192.168.1.73:4316/stage. You will then be
presented with the home page of the OpenLP Stage View. On most browsers
you can press F11 to go into fullscreen mode.

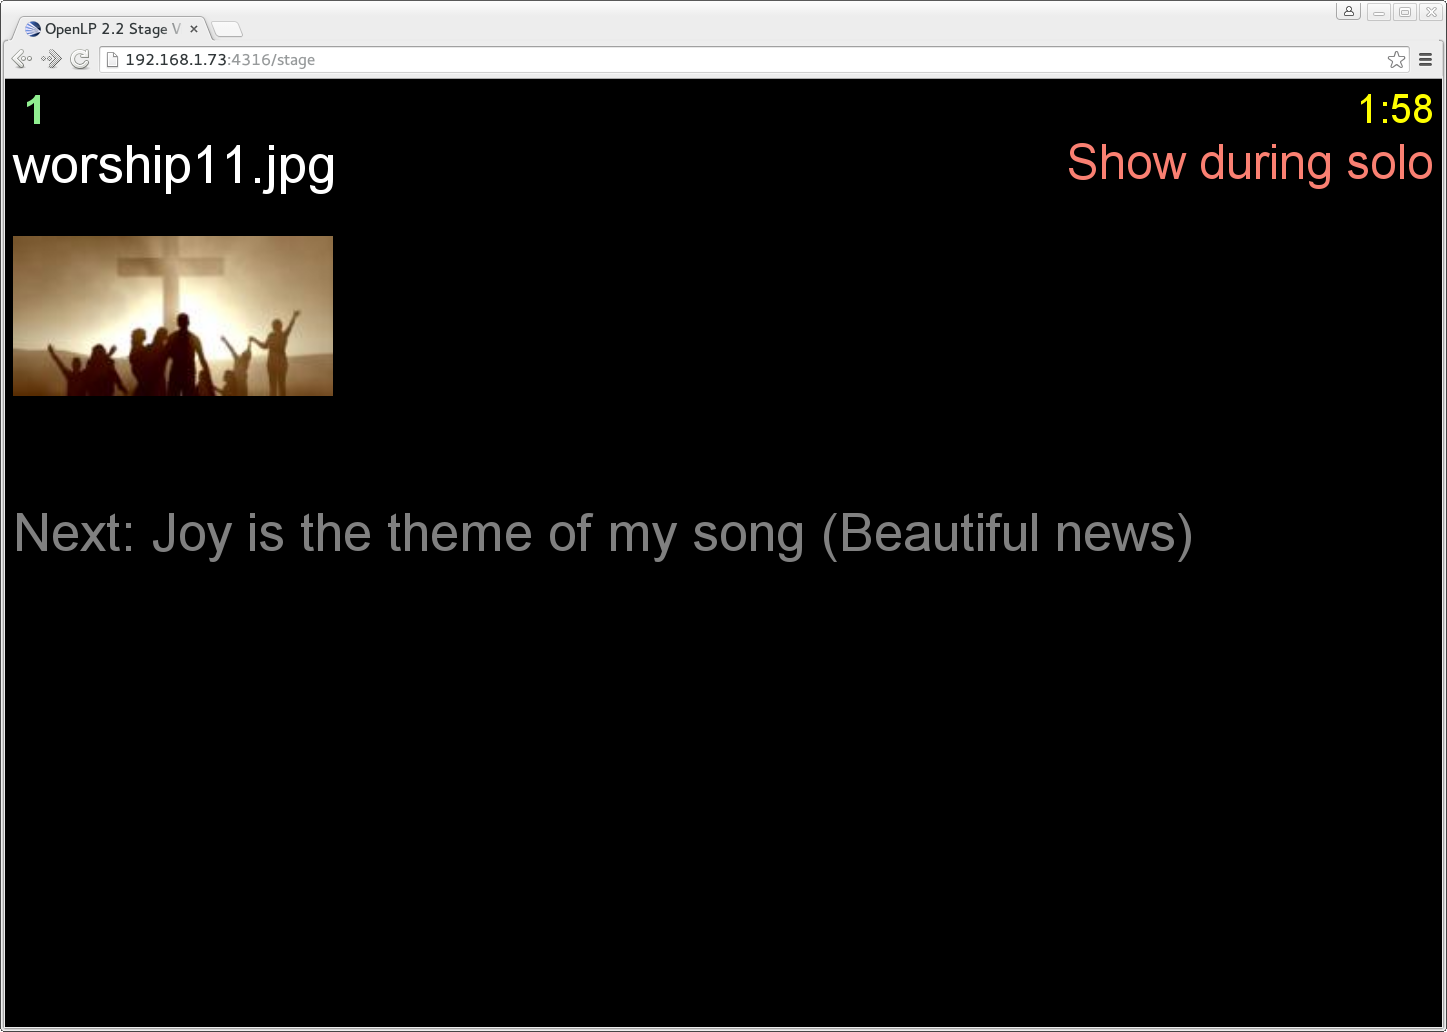
At the top right hand side you will see the time of day. This can be
changed from 12 hour to 24 hour format in remote_tab. If you added a note to the the song it
will be the next line below the time. See adding_note for adding notes. Below the note will be
the Bible or song verse numbers and one of those will be highlighted.
The lyrics or verses highlighted below the verse numbers correspond to
the highlighted verse number. In this example V1 is highlighted and the
corresponding first verse below it is highlighted.
If there is an image, presentation or media being displayed you will
see the title of the displayed item. Below the title will show the next
item to be displayed in the creating_service.
The Live View
Live view gives you the ability to set up remote computers that will mirror what your projector is showing. The Live view basically woks by taking screenshots of what the projector is showing and then presenting it in a browser. This means that audio and video playback will not be presented in the Live View.
The first step is to make sure the Remote plugin is activated. You
can accomplish this by following the instructions in the plugin_list. The second step
is to configure the settings you will use with the web browser. You can
find these instructions and settings in remote_tab.

Open a web browser, type in the Main View URL you found in remote_tab and press the
Enter key. For this
example we will use http://192.168.1.73:4316/main. You will then be
presented with the home page of the OpenLP Live View. On most web
browsers you can press F11 to go into fullscreen mode.